
Got questions? visit the
Toolbotics Community Forum
Tooli help - setting up the airbrush tool-head
Setting up the AIRBRUSH tool-head
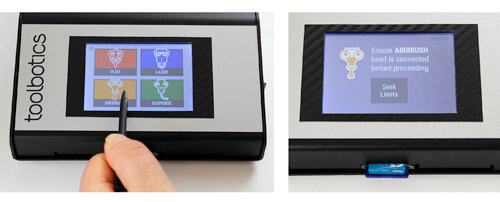
Tap AIRBRUSH in Toolbox screen, you will be prompted to install the airbrush tool-head.
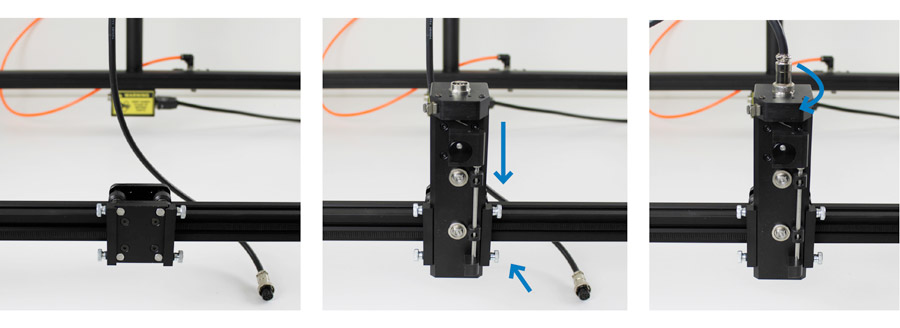
Slide the airbrush tool-head into dovetail slide. At this point, leave the tool sitting quite high and tighten the thumbscrews gently to hold the tool-head in place.
Attach the cable by inserting the plug into the socket on top of the tool-head and screw down the lock-nut (do not over-tighten).
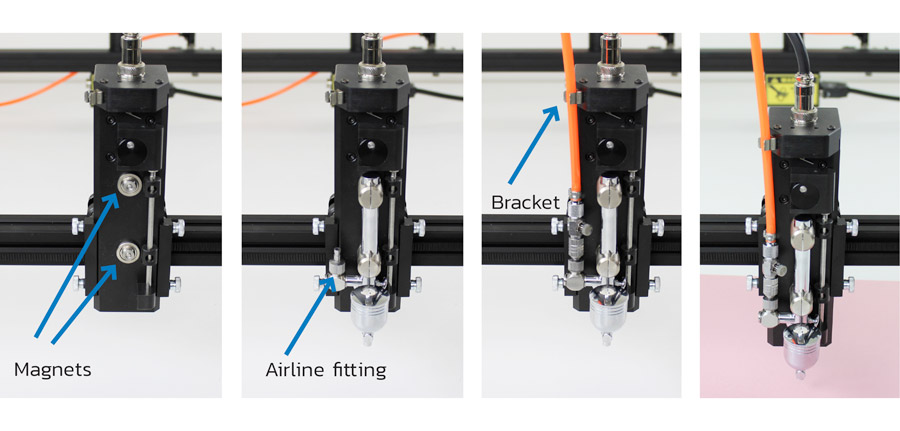
Attach the airbrush to the tool-head by aligning the magnets.
Pull the airline out from the cable arm (make sure you pull it all the way out). Attach the air-line to the fitting on the airbrush and secure the hose into the bracket on the tool-head to prevent it from moving around.
Note: The air-line will need to be attached to a compressor (not supplied with Tooli). The compressor should be capable of at least 30psi. The pressure you choose to run your job at will be determined by experimenting with your medium and your work surface. We recommend starting at 30psi and adjusting to suit the job. For example painting onto fabric may required more pressure (upto 65psi) so the paint is forced into the weave of the fabric. More delicate jobs such as ceramic painting may require as little as 15psi.
With the tool-head attached you can now tap Seek Limits - Tooli will move the head-carriage to back-right corner (slowly) until it has reached its X and Y limits. The head carriage will remain in this position at the end of the procedure.
Next you will need to do some testing with the height and paint flow settings of the airbrush, and the material you wish to use, to ensure you achieve the desired result.
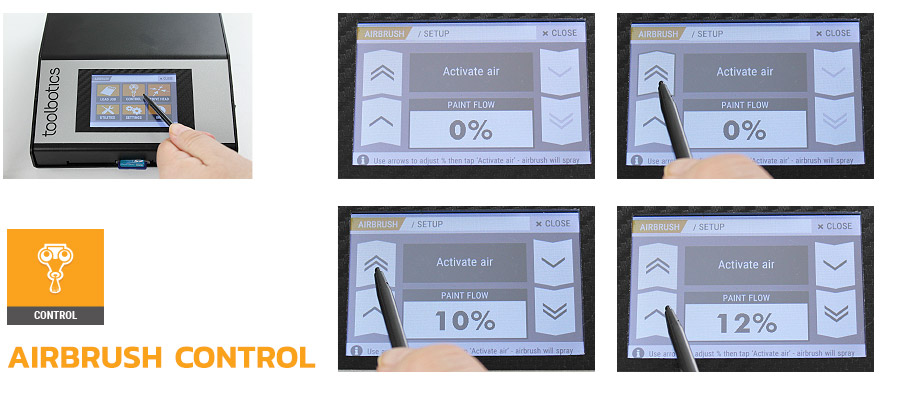
In the Airbrush home screen tap CONTROL
Fill airbrush pot with paint.
Place sample of material that you wish to airbrush under the tool-head.
Tap the airbrush CONTROL button.
Use the arrow keys to adjust paint flow (double arrow 10% increments, single arrow 1% increments).
Tap Activate air to spray paint.
Tap again to deactivate air.
You can manually move the material around under the airbrush to see the resulting spray-line.
Adjust the height of the airbrush tool-head (by loosening the thumbscrews moving the tool-head up or down and re-tightening the thumbscrews) and adjust the paint flow until you achieve the desired paint coverage/line thickness.
Leave the tool-head set at the height you have chosen and use the paintflow value that created the desired result when creating your G-Code in Art2Gcode.
Watch our video on how to set up the airbrush tool-head for more details.